Ad Campaigns Guide
Overview
Ad Campaigns in Affino are designed to display advertising banners and notices on your Affino site, with robust ad-blocking counter-measures and efficient tracking.
Affino ad campaigns are built-in, lightweight, and integral to the platform, allowing for almost instant appearance and effective on-site tracking and analysis.
You will need to set up the following for your Ad Campaign to commence:
- Create the Advertiser Account
- Add the Creative
- Create the Ad Campaign
- Add the Ad Campaign to the Campaign Theme
- Assign the Campaign Theme to Channel
- Set up the Campaign Analysis Channel
Create the Advertiser
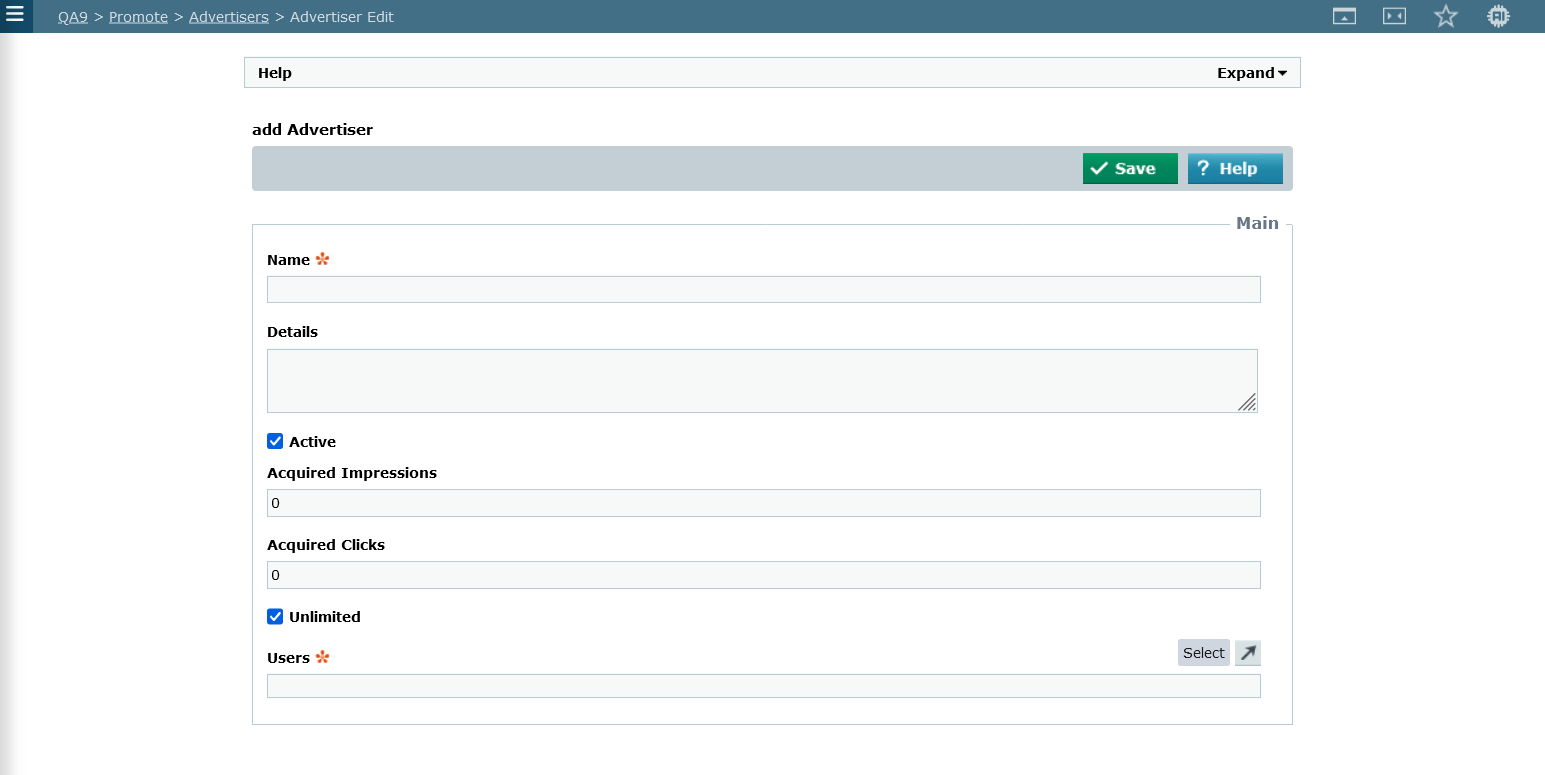
Advertisers in Affino are tied to Ad Campaigns.
On the Advertiser detail screen you can set the amount of Impressions and Clicks allocated to that Advertiser. You can also activate or deactivate campaigns via the 'Active' tick box. Advertisers will have users that will access the Ad Campaign Analysis screen, you set those users on the Users field.
Fields and Options:
- Name: Enter the Name for this Advertiser
- Details: Enter a description of the Advertiser, especially if the advertiser is a specific company or in-house ad campaign. Especially useful when you have a large number of advertisers and / or in-house ad campaigns running.
- Active: Tick box to make this Advertiser's Account Active. If the Advertiser is not Active, then none of the Advertiser's Ad Campaigns will be served
- Acquired Impressions: The total number of Impressions that have been acquired by this Advertiser
- Acquired Clicks: The total number of Clicks that have been acquired by this Advertiser
- Unlimited: Tick box to make this Advertiser's Account Unlimited, meaning that there is no restriction on the number of impressions or clicks served on ad campaigns for this Advertiser. This can be used for Internal Ad Campaigns, Sponsor Ad Campaigns, demonstrations or Service Ad Campaigns.
- Users: Select the Users you wish to assign to this Advertiser.
Add Creatives
Control > Marketing > Creatives > Creative
You can set up the following types of creatives by navigating to the Creatives listing screen and clicking on the Add button. Select the desired type then fill in the required fields and options:
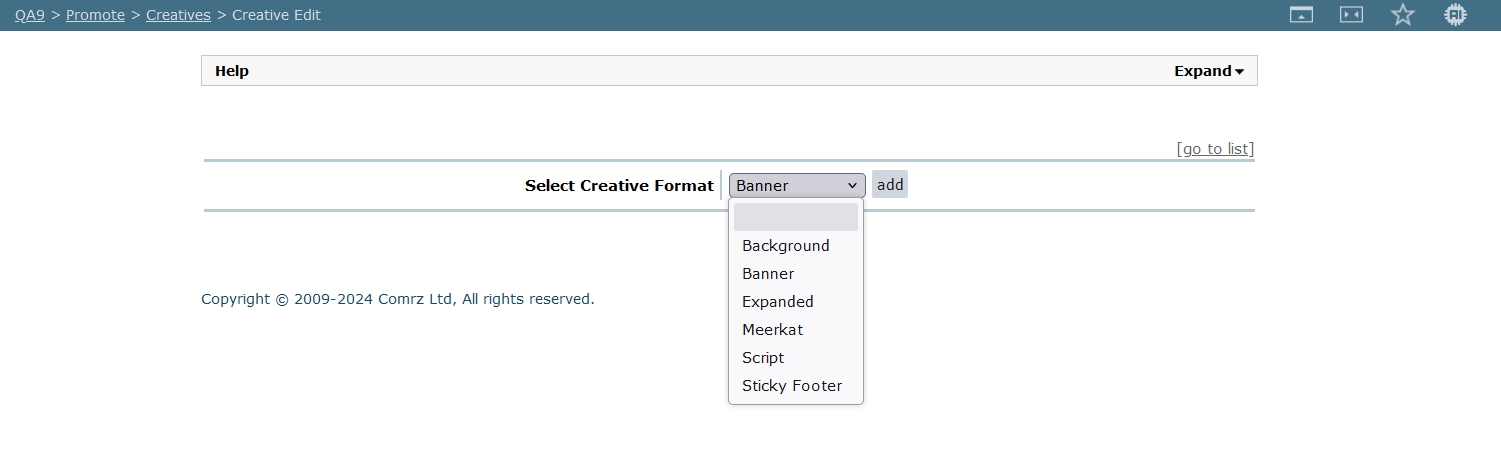
- Background - this is an image which sits in the background of the page - typically the left and right columns of the screen, or the ’pillars’ of a ’fireplace’ campaign (Background + Leaderboard Banner)
- Banner - Your most common Creative Type - JPEG, PNG or Animated Gif at various sizes - Full Banner, MPU, Button etc.
- Expanded - A banner which spring-boards a larger image - usually cascading from top - to expand to fill a large part of the viewable area - need to assign button icons for expand / close icons
- Meerkat - A base peer-up banner - that moves up into position from the base of the screen - because of the animation component, this element is intended for laptop / desktop and not really for lower mobile breakpoints
- Sticky Footer - A sticky banner which is anchored to the base of the screen - ideal for mobile format breakpoints - often used in conjunction with Meerkat, so that Meerkat is for larger breakpoints while Sticky Footer replaces Meerkat on lower level breakpoint mobile devices. Sticky Footer is also often used for Mobile in place of ’Frieplace Campaign’ which can dominate desktop screen, for mobile, sticky footer acts as a in impactful equivalent - without overly skewing the screen real-estate.
Script Type Creative:
Script-type banner ads need to adhere to the following best practices:
Asyncronous Scripts
- Script-type banner ads need to be asynchronous in Affino
Media and Resource Management
- Ensure all media elements (e.g., images, JavaScript, multimedia) are properly available and referenced.
- Incorrect resource management may result in rendering issues or broken functionality.
Facilitate effective targeting and monitoring
- Use the provided reference tags without modification
- Escape all non-reference pound signs (#) by doubling them (##), particularly in color codes or other instances.
Security Rights:
- Affino will replace the "script" tags if the user creating the creative doesn't have the "Scripting" security right, hence it won't work correctly.
Fields and Options
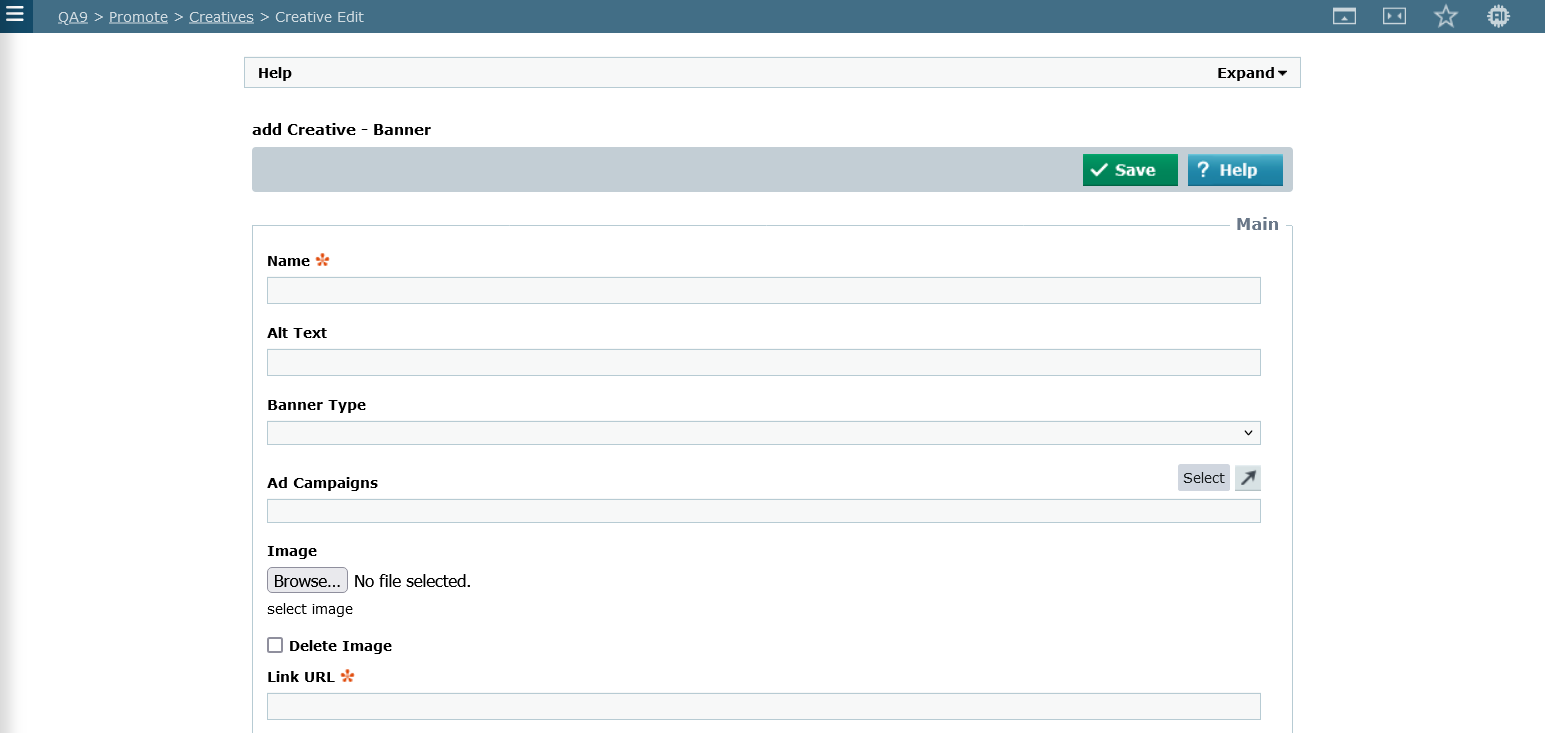
Main
- Name: Enter the Name for this Creative.
- Alt Text: Enter text which appears when you mouseover Creative Image, if no text entered, no Alt Text will appear
- Banner Type: Select the Banner Type for this creative.
- Ad Campaigns: Select the Ad Campaigns you wish to use with the Creative in.
- Image: select image
- Delete Image: If ticked, the Image file will be deleted when you save the Creative
- Link URL: Enter the URL that the Creative is targetting (this needs to be in the format of "https://www.affino.com")
- Target Tag: Select the method in which the link opens its target: '_blank' opens a new window every time; '_self' will always target the frame it is in, essentially opening the new page in the same frame; '_parent' targets the frame containing the current frame; '_top' targets the full window of the current browser, irrespective of all frames that may be there; most frequently you should select '_top'
- Hide Creative At Resolution: Enter a pixel resolution (number) at which the background creative will be hidden. For background creatives, the main area is set at 70% width with each side being 15%. This is useful where a navigation bar for instance requires more room, hence hiding the background creative at a different resolution from the standard breakpoints may be required.
- Border: Enter the border width around the banner image - in pixels.
- Topics: Select the Topics to apply to the Creative.
- Geo Targeting: Select the countries you want to target with this Creative. Note that countries not selected may display a blank placement holder if you have set up your Skin incorrectly.
Note: the Topics setting on a Creative is for Campaign Stats. It is used to identify and record performance data based on the overlap between Ad Campaign targeting and Article tagging.
Example: an Ad Campaign targets three specific topics. If a user lands on an article tagged with five topics, and two of those topics align with the ad campaign's targeting, Affino uses the two matching topics for statistical calculations related to the ad campaign and its creatives.
Banner Types
For a detailed explanation of how Banner Types work, please consult this FAQ:
Responsive Breakpoint Images
Breakpoints on Creatives allow images to adjust within set widths to ensure they display correctly across different screen sizes. Breakpoint images work within predefined width ranges to ensure that the creative adapts smoothly to various screen sizes without distortion.
The specific breakpoints are:
- 0 to 480px
- 481 to 600px
- 601 to 800px
- 801 to 1024px
- 1025 to 1200px
Options:
- Breakpoint: select the desired breakpoint
- Image: add the image used for the selected breakpoint
- Delete Row: tick to delete the breakpoint (works with the Delete Selected function)
- Add Row: add a new breakpoint
- Delete Selected: works with the Delete Row tickbox, click to delete the selected breakpoint
Note: you need to set up a Breakpoint Profile (Control > Design > Breakpoint Profiles) for each or several breakpoints you wish to use
Security
- Content Security Right: Select from the drop-down menu which user group will be shown this Creative
Publication
- From: Select the date you want to be serving this specific Creative from if it is different from the overall Ad Campaign. If not set then the Creative will be served for the duration of the Ad Campaign.
- To: Select the date you want to be serving this specific Creative up to if it is different from the overall Ad Campaign. If not set then the Creative will be served for the duration of the Ad Campaign.
- Live: Select to make this Creative Live. Only if it is Live will it be displayed as part of a ad campaign
Note:
- For Expanded and Sticky Footer we have 3 additional fields (Expanded Image, Expand Image Icon and Collapse Image Icon)
- For Meerkat we have 1 additional field: Frequency Cap (per 30 mins | Hour | 2 hours | 6 hours | 12 Hours | Day)
- The Expanded and Sticky Footer also use Close Icon from Design Style applied to Campaign Theme
- Users will need the "Scripting" system security right so that, when they create a Creative of type Script, it can be saved with certain tags. If the user setting up the Script type Creative doesnt have that security right then Affino will remove the tags.
- There are no Impressions for Script type Creatives - only servings. It is not possible to count clicks on Scripts
- Stats are not collected for 3rd party scripts
Add Campaigns
Fields and Options:
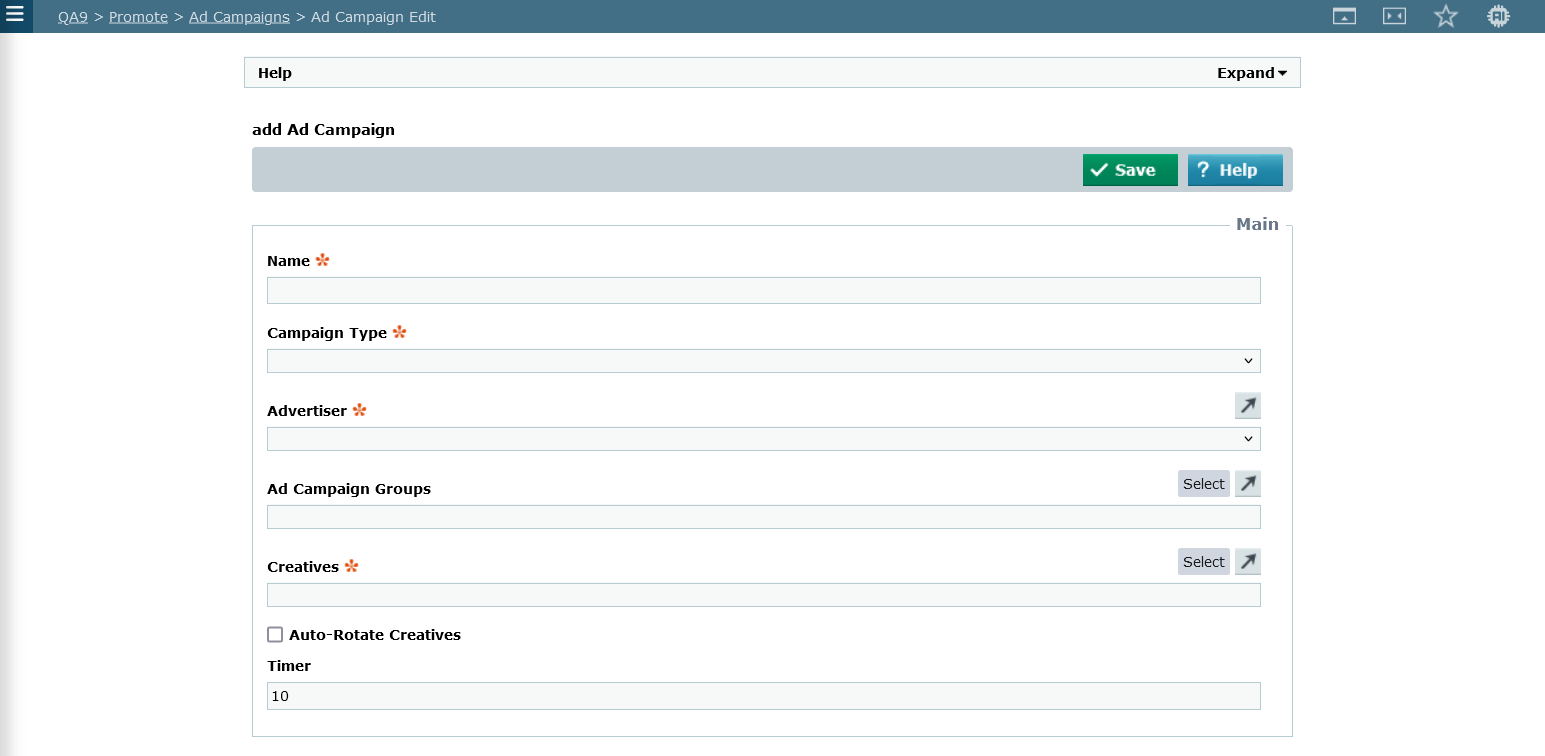
Main
- Name: Enter the Name for this Campaign
- Campaign Type: Using the drop down menu, select the type of Ad Campaign you would like to use: Ad, Sponsor, Affiliate, or Service. Campaign Types are primary for reference at this stage, and in future releases the Campaign Type will determine a number of factors so it is essential to have them identified correctly.
- Advertiser: Select from the drop-down menu the Advertiser that this Ad Campaign belongs to
- Ad Campaign Groups: Select the Campaign Groups to be associated with the Ad Campaign.
- Creatives: Select the Creatives you wish to assign to this Ad Campaign.
- Auto-Rotate Creatives: Select to automatically rotate Creatives with below Timer interval setting. Please note this will only rotate creatives within this campaign and not rotate creatives where there are other campaigns added to the same Campaign Placement Area, unless the page is reloaded.
- Timer: Enter in seconds the duration for which each Creative appears before rotating to the next.
Target
- Priority: Select the priority for this Ad campaign - 1 being the highest.
- Unlimited: Select Unlimited to remove any limit on the number of creatives served as part of the Ad Campaign; if selected, remember to enter 0 in Impression and Click Limits
- Impressions Limit: The Impression Limit is the maximum number of Impressions to be served for this Ad campaign before it ceases to be displayed. If this Ad Campaign is to be unlimited you must enter 0 and tick the Unlimited box below
- Click Limit: Enter the maximum number of Clicks for this Ad campaign before it ceases to be active. The Click Limit cannot be greater than the Impressions Limit.
- Daily Limit Cap: Select to cap the daily limit for this campaign. This will balance out the inventory over the duration of the campaign. If deselected, the campaign will continue to be served if there are available slots during the day, meaning the campaign could be completed sooner.
- Topic Targeting: Select Topic targeting to display the Ad campaign only when they match the User's Interests or the Item/Section/Channel Topics. The Topics will need to be assigned to the Ad Campaigns or Creatives to take affect (Options: No Topics Targeting, Target Item/Section/Channel Topics, Target User's Interest)
- Target Topics: Select up to 5 topics to target. Ads will be served Run of Site where there is a match to the User's Interest or Channel Topic.
- Excluded Topics: Select to exclude the presentation of this ad campaign when the selected topics are present on the page. Note that a maximum of 10 exclusion topics can be selected. Note that when the same topic is included for targeting and exclusion then the exclusion outweighs the targeting one.
Topic Targeting Operator (OR / AND) For multiple topics, select how you want topics to be filtered, e.g. Topic1 AND Topic2 AND Topic3, Topic1 OR Topic2 OR Topic3. - Target Channels: Select the Channels to apply this Ad Campaign. If you do not select any Channels, it will be displayed run of site on the Channels where the Ad Campaign Theme is specified. Please note you will need to also assign the Ad Campaign to the Ad Campaign Themes and select the Campaign Placement Area in order for the Ad Campaign to take effect.
- Excluded Channels: Select to exclude the presentation of this ad campaign when the selected channels are present on the page. Note that a maximum of 10 exclusion channels can be selected. Note that when the same channel is included for targeting and exclusion then the exclusion outweighs the targeting one.
Security
- Security Clearance: Select from the drop-down menu which user group can have access to this Ad Campaign
Publication
- Publish Start: Enter the date you want this Ad Campaign to Start (Date, Time, Hour, Minutes)
- Publish End: Enter the date you want this Ad Campaign to End (Date, Time, Hour, Minutes)
- Live: Select to make the Ad Campaign Live (deselect to suspend the Ad Campaign)
Note: please be aware that Topic Targeting needs to be set to "Target Item/Section/Channel Topics" or "Target User's Interests" for Target Topics and/or Excluded Topics to work
Also, any user who wishes to set up an Ad Campaign and its Creatives will need the Campaign Management system security right. Additionally, they will need the Campaign Statistics system security right if they wish to view the related analysis stats.
Add the Campaign Theme
Campaign Themes in Affino are used to map various campaigns and creatives to specific placement areas on the site, ensuring targeted and organized ad displays.
Campaign Themes are set up by assigning campaigns to different placement areas (slots) on the relevant Design Objects or Skins. This allows for the strategic placement of ads across the site.
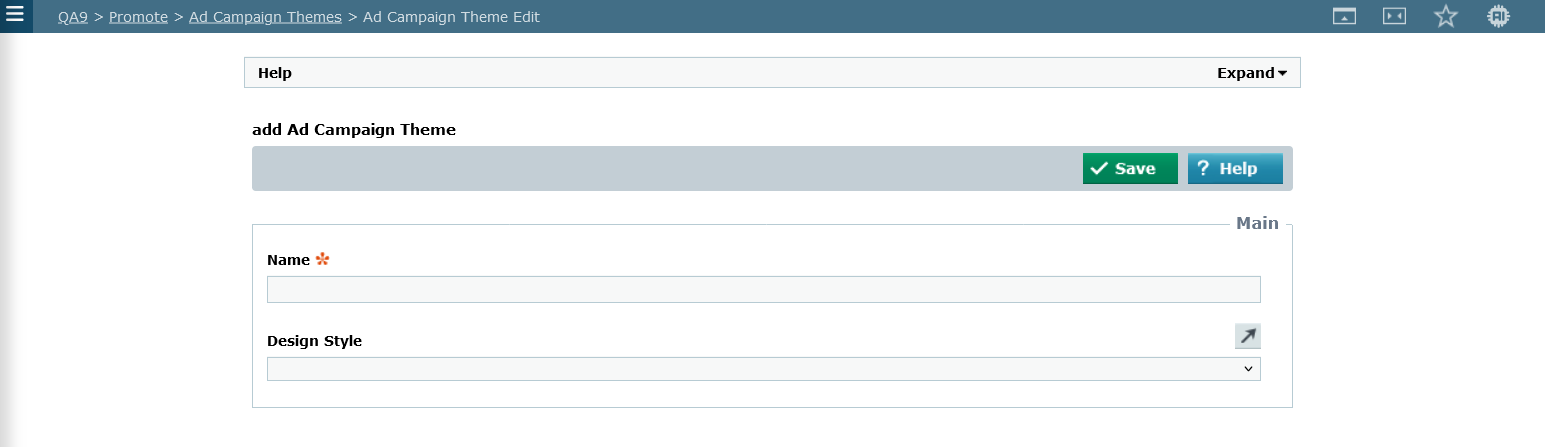
Adding / Creating the Theme
- Name: Enter the Name for this Ad Campaign Theme
- Design Style: The style determines the format of the display text and link if relevant
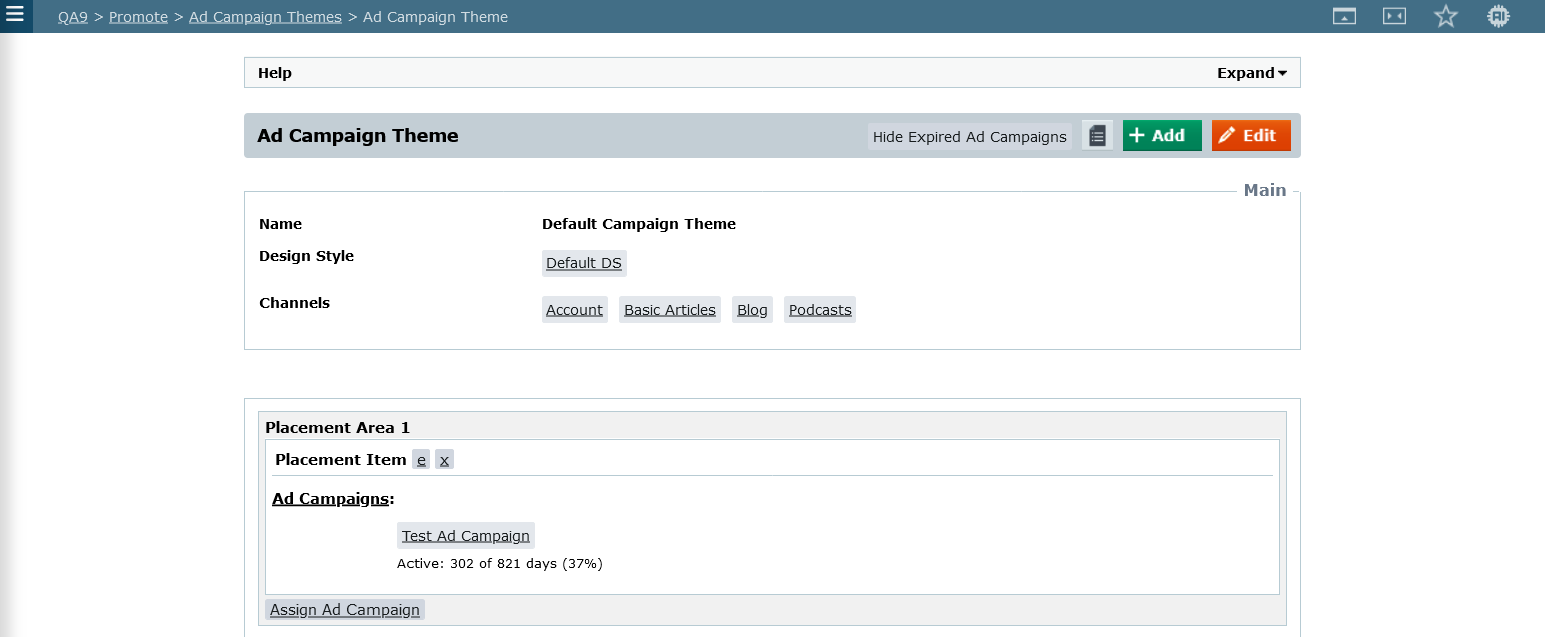
Adding / Removing Campaigns to the Theme
- Name: the Name for this Ad Campaign Theme
- Channels: the channels associated to the theme
- Placement Area: this is where the creative will be placed on the display side
- Placement Item: select "e" to edit the campaign on the Placement Area, select "x" to delete the campaign
- Assign Ad Campaign: add an Ad Campaign to the Placement Area
Assign or Edit the Placement Item (the Ad Campaign on the Placement Area)
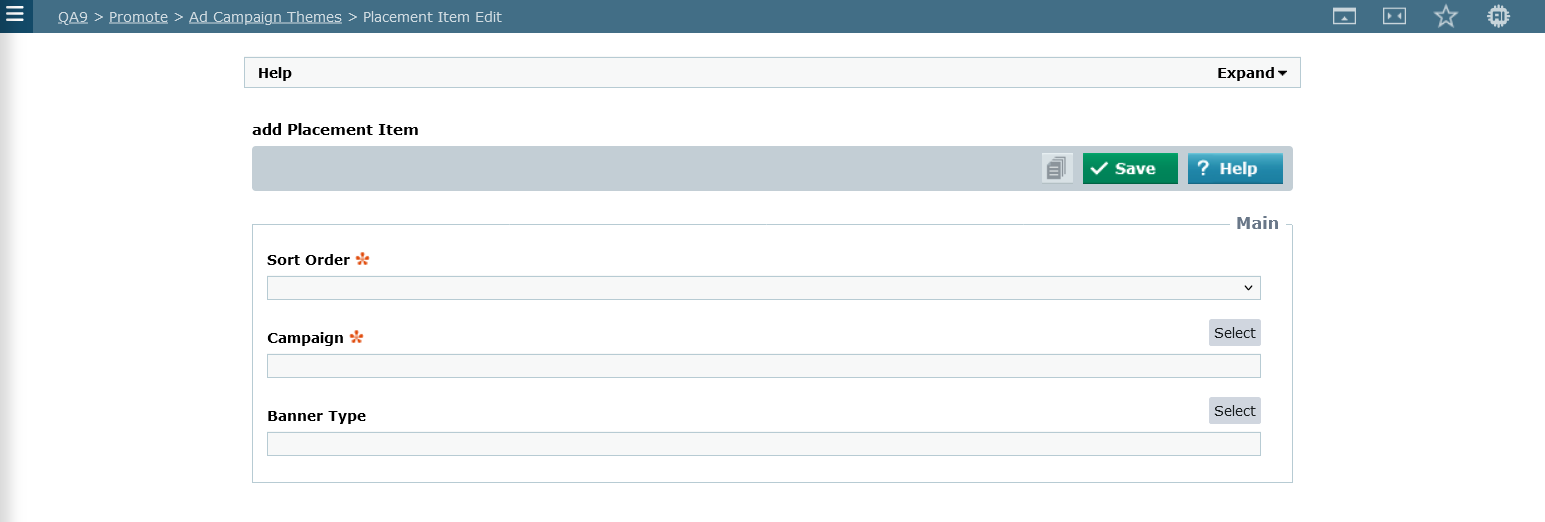
- Sort Order: the order this Placement Item is displayed within the Placement Area.
- Campaign: Select the Campaigns that you want to present in this Placement Item.
- Banner Type: Select the Banner Types for this Placement Item. If selected the Campaign Placement Area will only use the Creatives from the Ad Campaigns that match the banner type for displaying into this slot. Please ensure the width of the Creatives will fit within this area. Note: This only applies to Banner Creatives and does not apply to other formats like Meerkats, Backgrounds, etc.
Note: you can do clever ad-switching by having different Campaigns with different breakpoints assigned in same Placement slot; this can also be enforced to a degree by how the campaign slots are assigned per breakpoint on the actual Design Object
Assign Campaign Theme to Channel
Structure > Channels > Channel Edit > Profiles > Ad Camapaign Theme
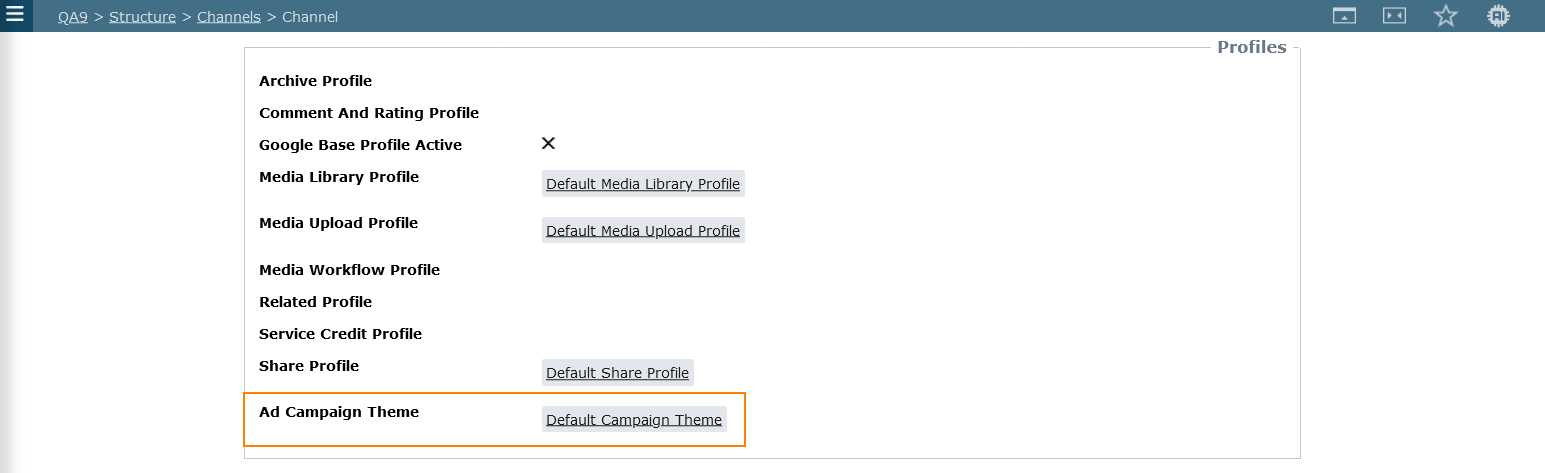
When you associate an Ad Campaign Theme to a Channel, it ensures that the Ad Campaign creatives will be displayed on that Channel.
More specifically, if there isn't an Ad Campaign Theme set on the Channel, then Ad Campaign creatives will not be shown anywhere under that Channel. Additionally, Ad Campaign creatives cannot be displayed on other Channels; they will only display on the Channel where the associated Ad Campaign Theme is set.
Ad Campaign Display Logic
Overview
This step explains how the Creatives of an Ad Campaign are selected and displayed on your website. Affino uses two main factors to determine which ads appear: Priority and Weight.
How Ad/Creative Selection Works
Each Ad Campaign is assigned a Priority level: 1, 2, or 3 (note: you have the option of not setting a Priorty)
Multiple ad campaigns within the same Placement Area can share the same priority
For every request to display an ad, Affino:
Collects all eligible Ad Campaigns and their Creatives
Sorts these ad campaigns into four priority buckets (one for each priority level)
Starts with the highest available priority bucket (beginning at Priority 1)
Selection Process
If there are multiple ad campaigns in the highest priority bucket, Affino selects one ad campaign using a weighted random algorithm
Each ad campaign’s weight increases its chance of being chosen. Campaigns with higher weights are more likely to be displayed
Affino tries to ensure that duplicate Creatives are not shown (if there's only one creative to display in all Placement Areas then it will be shown)
If an ad campaign has used up its allowed clicks, impressions, or daily limit, it is excluded from selection
Examples:
Example 1
Priority 1 Bucket:Ad Campaign A (weight 0)
Ad Campaign B (weight -2, green)
Ad Campaign C (weight 2, red)
Affino is likely to select Ad Campaign C more frequently than the others, as it has the highest weighting. While the other campaigns may still be chosen, they will appear less often.
Example 2
Priority 1 Bucket: empty
Priority 2 Bucket:Ad Campaign A (weight 0)
Ad Campaign B (weight 0)
Ad Campaign C (weight 0)
With no ad campaigns in Priority 1, Affino randomly selects any ad campaign from Priority 2, as all have equal weight.
Additional Rules
Ad Campaigns that have exhausted their click, impression, or daily limits are not included in any priority bucket
All other eligibility criteria must be met for an ad campaign to be considered
Summary Table
| Step | Action |
|---|---|
| 1. Gather Ad Campaigns | Collect all eligible ad campaigns and their creatives |
| 2. Sort by Priority | Place campaigns into priority buckets (1,2,3) |
| 3. Select Bucket | Start with the highest non-empty priority bucket |
| 4. Weighted Random | Randomly select an ad campaign from the bucket, weighted by ad campaign weight |
| 5. Show Creative | Display the selected creative, avoiding duplicates |
| 6. Exclude Ineligible | Remove ad campaigns that have reached their limits |
If all ad campaigns have similar weight, each has an equal chance of being shown.
This logic ensures fair and flexible ad distribution according to your marketing goals, while preventing duplicate displays and respecting ad campaign limits.
Auto Rotate Ad Campaigns
Affino has built-in logic for rotating Ad Campaigns. There isnt a specific setting for rotation on the Campaign Theme's 'Placement Item', the logic just checks the Auto-Rotate setting on each Ad Campaign. So long as the criteria is good (the Ad Campaign is "Live", there are enough Impressions/Clicks left, the Advertiser is "Live", the Topics match, etc) the Ad Campaigns will be automatically rotated on each Campaign Placement Area.
The rotational time is taken from the first Ad Campaign that is loaded, so it will use that time period as it rotates through the other ads.
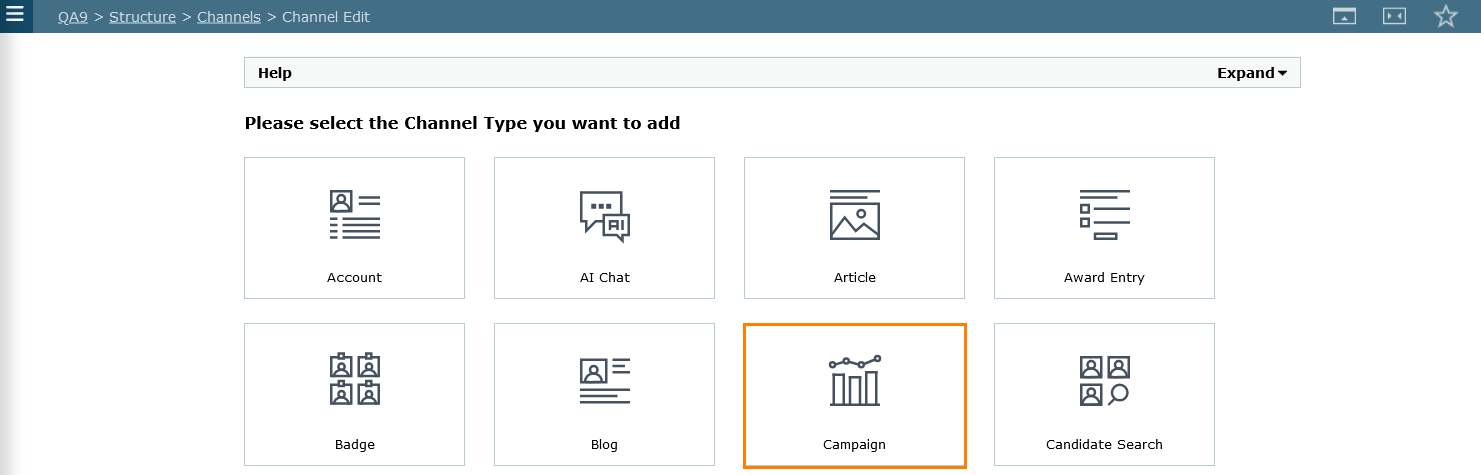
Set up the Campaign Analysis Channel
QA9 > Structure > Channels > Add > Campaign
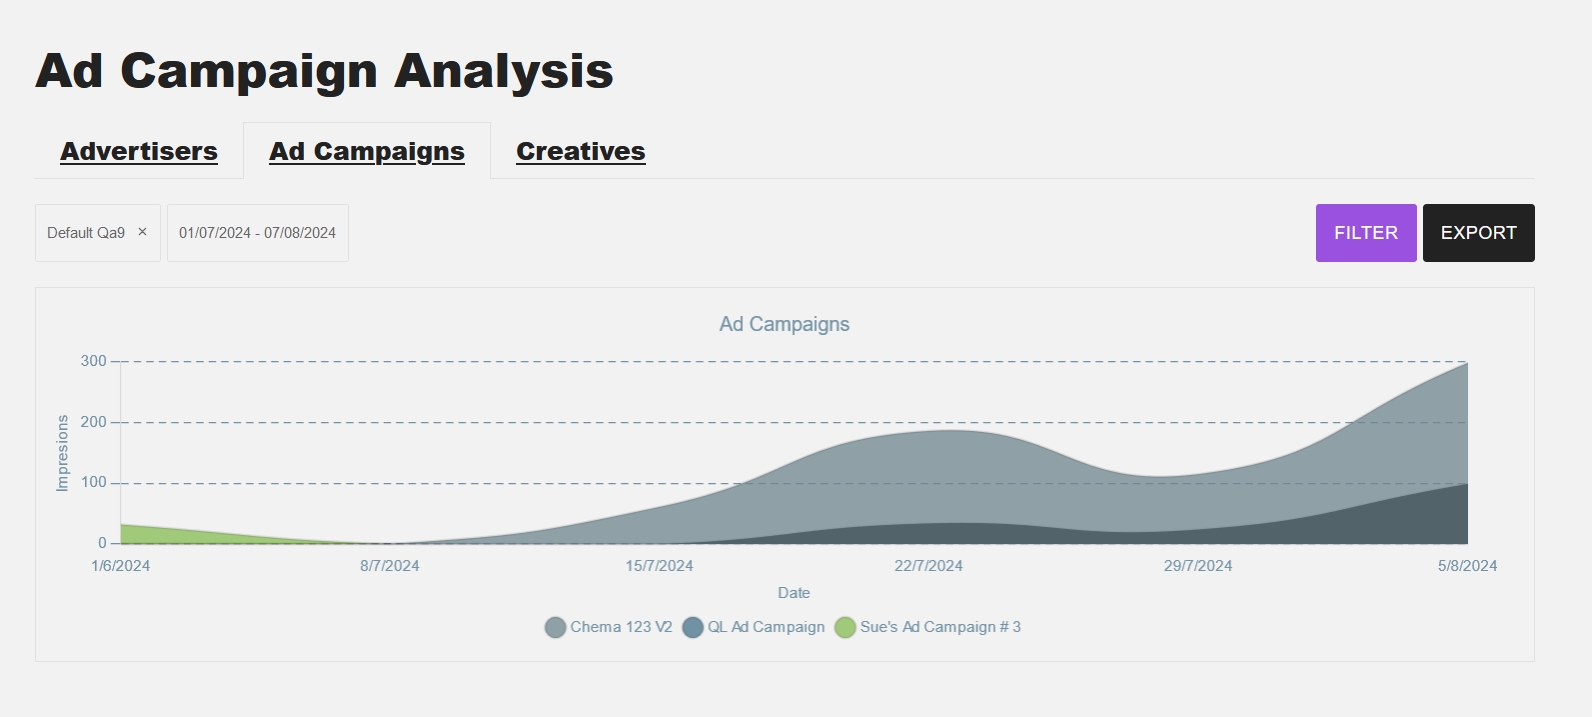
The purpose of the Ad Campaign Analysis channel is to provide insights and statistics on ad campaign performance, including impressions and clickthroughs for each advertiser, campaign, and creative.
This channel allows you to view detailed metrics and analyze the effectiveness of your ad campaigns, helping you to make informed decisions and optimize future campaigns.
If not already created, you can add the channel just like any other by clicking on the Add button on the Channel listing screen and selecting the Campaign type channel.
Note: the users associated to the Advertiser are the ones authorized and enabled to view this channel on the display side.
Also, when you are on "Advertisers" or "Creatives" tab, the Zone filter is set to the current zone by default. You cannot toggle the Zone filter when you're on those tabs since its disabled. The Zone filter is available if you're on the "Ad Campaigns" tab.
Troubleshooting
Please check the following settings in case your creatives are not displayed or taking longer to display:
Check if the Banner Type set on the Campaign Theme matches the Creative banner type. if its not the same, then the Creative will not be shown
- If you have a lot of Ad Campaigns on the same Placement Area on the Campaign Theme then the creatives will take longer to serve since they are all competing for the same space
- The Advertiser is not set to ’Active’
- The Creative is not set to ’Live’ or has an expired by Publish date
- The Ad Campaign is not set to ’Live’ or has an expired by Publish date
- Security Clearance set on the Ad Campaign or Creative: users without the applied security will not see the creatives
- Incorrect breakpoint image assignment: the creatives are not visible at a certain breakpoint
Also, these settings greatly influence an Ad Campaign:
Impressions Limit:
The Impressions Limit sets the maximum number of times your ad will be shown during the campaign. Once this limit is reached, the ad will stop being displayed. To run your campaign without any limit, enter “0” and select the “Unlimited” option.
Click Limit:
The Click Limit determines the maximum number of clicks your ad campaign can receive before it stops running. Please note, the Click Limit cannot exceed the Impressions Limit.
Daily Limit Cap:
Enabling the Daily Limit Cap helps distribute your ad delivery evenly throughout the campaign period. If you do not enable this option, your campaign may use up its total limit more quickly if there is available inventory during the day.
Weight:
The algorythm for showing creatives uses Weighting. This is calculated daily so that as many ads as possible meet the target of the ad campaign and the tenancy of the ads are balanced out. Weight plays a great part when you have a lot of creatives.
For more information, please consult the AI Support Chat and/or view the Ad Campaigns Overview video guide.
Did you find this content useful?
Thank you for your input
Thank you for your feedback
Driving business at some of the world's most forward thinking companies


Our Chosen Charity
![]()
Meetings:
Google Meet and Zoom
Venue:
Soho House, Soho Works +
Registered Office:
55 Bathurst Mews
London, UK
W2 2SB
© Affino 2026